WFDWY-XQXJF-RHRYG-BG7RQ-BBDHM
隐藏
2008年4月19日

SEH学习
据我所知,SEH在很多加壳程序里经常出现。
貌似就是try{} catch{} finally{}的本质体现
很多介绍SEH的教程前面都有这么一句
push    00401037                         ;  SE handler installation
push    dword ptr fs:[0]
mov     dword ptr fs:[0], esp
什么意思呢?
fs指向一个TIB结构 (THREAD INFORMATION BLOCK)
第一个元素fs:[0]指向一个_EXCEPTION_REGISTRATION结构
fs:[0]->
_EXCEPTION_REGISTRATION struc
prev dd ?                      ;前一个_EXCEPTION_REGISTRATION结构
handler dd ?                   ;异常处理例程入口
_EXCEPTION_REGISTRATION ends
这里
push    00401037                         ;  SE handler installation
push    dword ptr fs:[0]
mov     dword ptr fs:[0], esp
第一步放我们的异常处理函数地址
第二步放fs:[0]指向的异常处理函数地址
第三步用esp地址覆盖fs:[0]地址
结果就是这样,
图中栈顶数据为旧的fs:[0]地址,现在新的fs:[0]还是指向他,
改变的是第二个结构,即
handler dd ? ;异常处理例程入口
这样做,当发生异常就可以跳到我们自己定义的异常处理函数去了。
可以用od数据窗口跟踪最初的结构,比如dd fs:[0]
可以看出是这样的链式结构


2008年4月18日
tortoise SVN
今天在公司checkout了一个项目,死活都有错,用eclipse 的svn插件看不出log(也许我没看到)
使用乌龟svn看了看,果然被老大级的次长提交过,版本升级了.
好,直接checkout以前的版本,工作继续~~~~~

webwork开发-eclipse配置
总结了一下webwork开发的环境配置,转载请注明出处,以慰苦劳.
凡人凡居
在开发项目时,不管什么项目都需要一个好的开发环境,eclipse就是很好的了,当然很多牛人可能会有更多更好的办法,不过既然是主流,学好他也是我等小民的福气.
学习webwork时, 第一反应就是能不能集成到eclipse来,tomcate也继承进来,这样能调试就轻松了.也容易上手了. 恩,说干就干吧.
安装jdk1.5(现在好像有1.6了) 添加windows环境变量(我的电脑->属性->高级->环境变量)
添加JAVA_HOME: jdk路径
添加PATH值: 添加jdk/bin值
安装Tomcat5.5(好像有6.0了)
安装到需要填user/password画面时, password填入"fanren",其他默认
安装过程中查找系统中已安装的JRE,检查JRE安装路径是否正确
安装后启动Tomcat, http://localhost:8080查看经典画面
安装eclipse
http://www.eclipse.org/downloads/
我下载的for javaee的windows版本
解压即可,绿色产品.
启动eclipse
指定workspace
添加Ant View(Window->Show View->Ant)
eclipse环境设置Tomcat Server
Window > ShowView > Other > Server 选择Server>Servers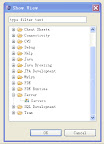
选择画面下方的Servers Tab, 单击鼠标右键, new->Server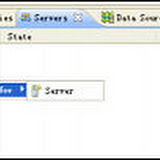
选择Tomcat 5.5 server
指定tomcate安装目录, 其他默认, ok, server tab出现Tomcat server了
右键启动
浏览http://localhost:8080, 有反应就成功了, 我这里出错提示,因为没项目嘛
新建NewLife项目 new> project> web> Dynamic Web Project
其他默认就可以了,finish
在src目录下添加子目录
conf (存放配置文件)
java (存放java源文件)
在web\WEB-INF新建子目录
classes (存放class文件和配置文件)
选择"NewLife"项目, 右键选择Properties
选择"Java Build Path", 单击Source tab, 单击Add Folder,展开NewLife>src文件夹
勾上src下的conf,java, 点击OK, 出现递归警告, remove掉src目录就好了
在"Default output folder:", 点击Browse, 选择WEB-INF\classes(新建的classes目录),
点击OK, classes目录会自动隐藏. 注意这里要选择 "java"视图, 默认是"java ee"视图, 右上角点击小窗口图标进行选择.
项目与Tomcat Server相连
选择下方的Servers Tab,右键选择 "Add and Remove Projects"
点击NewLife , 点击add>, 项目出现先右侧, OK
导入webwork lib库
参考http://wiki.javascud.org/display/ww2cndoc/Getting+Started
选择web/WEB-INF/lib,右键选择import>Gerneral>FileSystem,
选择"webwork-2.2.5\lib\default",确定->全选->Finish,
在"Web App Libraries"下可以看见导入的jar包
按照同样方法导入webwork-2.2.5.jar, lib/spring下的所有jar包,为什么使用spring,wiki上有说明
编写配置文件, copy吧
web.xml
<?xml version="1.0" encoding="UTF-8"?>
<web-app id="WebApp_ID" version="2.4"
  xmlns="http://java.sun.com/xml/ns/j2ee"
  xmlns:xsi="http://www.w3.org/2001/XMLSchema-instance"
  xsi:schemaLocation="http://java.sun.com/xml/ns/j2ee http://java.sun.com/xml/ns/j2ee/web-app_2_4.xsd">
  <display-name>NewLife</display-name>
  <welcome-file-list>
      <welcome-file>index.html</welcome-file>
      <welcome-file>index.htm</welcome-file>
      <welcome-file>index.jsp</welcome-file>
      <welcome-file>default.html</welcome-file>
      <welcome-file>default.htm</welcome-file>
      <welcome-file>default.jsp</welcome-file>
  </welcome-file-list>

  <filter>
      <filter-name>webwork</filter-name>
      <filter-class>
          com.opensymphony.webwork.dispatcher.FilterDispatcher
      </filter-class>
  </filter>

  <filter-mapping>
      <filter-name>webwork</filter-name>
      <url-pattern>/*</url-pattern>
  </filter-mapping>
  <!-- As of 2.2, Spring is the preferred IoC container rather than XWork,
      so you'll have to include the spring jars if you want to use
      Spring's IoC capabilities in WebWork. (Thanks Hani for commenting)
      If you want to use deprecated integrated IoC container instead, you may
      want to omit the following listener configuration.
  -->

  <!-- The following taglib directive would be needed if your servlet container would comply
      to Servlet Spec <= 2.2
      <taglib>
      <taglib-uri>/webwork</taglib-uri>
      <taglib-location>/WEB-INF/lib/webwork.jar</taglib-location>
      </taglib>
  -->
</web-app>
xwork.xml
<!DOCTYPE xwork PUBLIC "-//OpenSymphony Group//XWork 1.1.1//EN"
"http://www.opensymphony.com/xwork/xwork-1.1.1.dtd">

<xwork>
  <!-- Include webwork defaults (from WebWork JAR). -->
  <include file="webwork-default.xml" />

  <!-- Configuration for the default package. -->
  <package name="default" extends="webwork-default">
      <default-interceptor-ref name="completeStack"/>

      <action name="helloWorld" class="fanren.HelloWorld">
          <result name="success">WEB-INF/jsp/hello.jsp</result>
      </action>
  </package>
</xwork>
Web/WEB-INF/jsp/hello.jsp
<%@ taglib prefix="ww" uri="/webwork" %>
<html>
 <head>
  <title>Hello Page</title>
 </head>
<body>
  The message generated by my first action is:
  <ww:property value="message"/>
</body>
</html>
重启tomcat, 访问http://localhost:8080/NewLife/helloWorld.action
出现
The message generated by my first action is: Hello, WebWorld! The time is: 2008-4-18
调试也可以了, 以debug模式启动tomcat, 记得先下好断点.
2008年4月17日


a duplicate insert block exists for class CDialog
重新学习mfc啦, 又遇到了以前遇到的问题, 以前有老师在, 就没加下方法, 现在有google在, 不过千万别看中文的解决方法.
原因就是mfc假死了, 一直在那儿build,又build不出来个究竟, 怒了, 直接灭掉. 于是资源出现问题了,刚建的对话框没了,于是删啊删啊, 把该删的都删了,重新创建对话框还是有错误(见标题), 于是google之,
解决方法: 删除不要的dialog.cpp, dialog.h, .clw文件, 重新打开vc, ctrl+w进入类视图, 直接点ok重建,就好了
危害:不想重头来过的话,解决它吧!
2008年4月10日
测试代码高亮
如果速度你可以忍受的话,可以试试!
别人写出来了,我就不改着名再写了
int main()
{
printf("hello, beauty!\n");
return 0;
}
比较
int main()
{
printf("hello, beauty!\n");
return 0;
}
本博客的模板代码
黑白永远是最提神的搭配.
round4的, 可以对比着改改,我刚弄, 没有改多少, 可以让你从不会到稍微会一点,
不需要多少知识,真的. 有一点注释(其实都没必要)
直接贴过去也可以, 注意贴过去就成我的标题了哦@_@
如下<?xml version="1.0" encoding="UTF-8" ?>
<!DOCTYPE html PUBLIC "-//W3C//DTD XHTML 1.0 Strict//EN" "http://www.w3.org/TR/xhtml1/DTD/xhtml1-strict.dtd">
<html expr:dir='data:blog.languageDirection' xmlns='http://www.w3.org/1999/xhtml' xmlns:b='http://www.google.com/2005/gml/b' xmlns:data='http://www.google.com/2005/gml/data' xmlns:expr='http://www.google.com/2005/gml/expr'>
<head>
<b:include data='blog' name='all-head-content'/>
<title><data:blog.pageTitle/></title>
<b:skin><![CDATA[/*
-----------------------------------------------
Blogger Template Style
Name: Rounders 4
Designer: Douglas Bowman
Modifier: 凡人
URL: www.stopdesign.com
Date: 27 Feb 2004
Updated by: Blogger Team
----------------------------------------------- */
/* Variable definitions
====================
<Variable name="mainBgColor" description="Main Background Color"
type="color" default="#466" value="#000000">
<Variable name="mainTextColor" description="Text Color" type="color"
default="#ced" value="#cceedd">
<Variable name="postTitleColor" description="Post Title Color" type="color"
default="#fff" value="#ffffff">
<Variable name="dateHeaderColor" description="Date Header Color"
type="color" default="#cf4" value="#ccff44">
<Variable name="borderColor" description="Post Border Color" type="color"
default="#bbb" value="#bbbbbb">
<Variable name="mainLinkColor" description="Link Color" type="color"
default="#fff" value="#ffffff">
<Variable name="mainVisitedLinkColor" description="Visited Link Color"
type="color" default="#fff" value="#ffffff">
<Variable name="titleTextColor" description="Blog Title Color"
type="color" default="#fff" value="#ffffff">
<Variable name="topSidebarHeaderColor"
description="Top Sidebar Title Color"
type="color" default="#fff" value="#ffffff">
<Variable name="topSidebarBgColor"
description="Top Sidebar Background Color"
type="color" default="#9b5" value="#000000">
<Variable name="topSidebarTextColor" description="Top Sidebar Text Color"
type="color" default="#fff" value="#ffffff">
<Variable name="topSidebarLinkColor" description="Top Sidebar Link Color"
type="color" default="#fff" value="#ffffff">
<Variable name="topSidebarVisitedLinkColor"
description="Top Sidebar Visited Link Color"
type="color" default="#eee" value="#eeeeee">
<Variable name="bottomSidebarBgColor"
description="Bottom Sidebar Background Color"
type="color" default="#fff" value="#ffffff">
<Variable name="bottomSidebarTextColor"
description="Bottom Sidebar Text Color"
type="color" default="#666" value="#666666">
<Variable name="bottomSidebarLinkColor"
description="Bottom Sidebar Link Color"
type="color" default="#475" value="#ffffff">
<Variable name="bottomSidebarVisitedLinkColor"
description="Bottom Sidebar Visited Link Color"
type="color" default="#798" value="#779988">
<Variable name="bodyFont" description="Text Font" type="font"
default="normal normal 100% 'Trebuchet MS',Verdana,Arial,Sans-serif" value="normal normal 100% 'Trebuchet MS',Verdana,Arial,Sans-serif">
<Variable name="pageTitleFont" description="Blog Title Font" type="font"
default="normal bold 300% 黑体" value="normal bold 300% 黑体">
<Variable name="descriptionFont" description="Description Font" type="font"
default="normal normal 100% 'Trebuchet MS',Verdana,Arial,Sans-serif" value="normal normal 100% 'Trebuchet MS',Verdana,Arial,Sans-serif">
<Variable name="headerFont" description="Sidebar Title Font" type="font"
default="normal bold 100% 'Trebuchet MS',Verdana,Arial,Sans-serif" value="normal bold 100% 'Trebuchet MS',Verdana,Arial,Sans-serif">
<Variable name="postTitleFont" description="Post Title Font" type="font"
default="normal bold 135% 'Trebuchet MS',Verdana,Arial,Sans-serif" value="normal bold 200% 黑体">
<Variable name="startSide" description="Start side in blog language"
type="automatic" default="left" value="left">
<Variable name="endSide" description="End side in blog language"
type="automatic" default="right" value="right">
*/
body {
background:#bca;
margin:0;
text-align:center;
line-height: 1.5em;
font: x-small Trebuchet MS, Verdana, Arial, Sans-serif;
color:$mainTextColor;
font-size/* */:/**/small;
font-size: /**/small;
}
/* 贴源代码用的 */
code {
display: block; /* fixes a strange ie margin bug */
font-family: Courier New;
font-size: 10pt;
overflow:auto;
background: #000000 left top repeat-y;
border: 1px solid #ccc;
padding: 10px 10px 10px 21px;
max-height:200px;
line-height: 1.2em;
}
/* Page Structure
----------------------------------------------- */
/* The images which help create rounded corners depend on the
following widths and measurements. If you want to change
these measurements, the images will also need to change.
*/
#outer-wrapper {
width:80%; /* 这些比例就是能缩小放大你的博客格局, 很多我手动调的 */
margin:0 auto;
text-align:$startSide;
font: $bodyFont;
}
#main-wrap1 {
width:70%;
float:$startSide;
background:$mainBgColor $startSide bottom; /* 记得把那些边框圆角图片去掉, 要不就露馅了*/
margin:15px 0 0;
padding:0 0 10px;
color:$mainTextColor;
font-size:97%;
line-height:1.5em;
word-wrap: break-word; /* fix for long text breaking sidebar float in IE */
overflow: hidden; /* fix for long non-text content breaking IE sidebar float */
}
#main-wrap2 {
float:$startSide;
width:100%;
padding:10px 0 0;
}
#main {
padding:0;
width:100%; /* 必须100% */
}
#sidebar-wrap {
background: #000 $startSide top;
width:26%;
float:$endSide;
margin:15px 0 0;
font-size:97%;
line-height:1.5em;
word-wrap: break-word; /* fix for long text breaking sidebar float in IE */
overflow: hidden; /* fix for long non-text content breaking IE sidebar float */
}
.main .widget {
margin-top: 0;
margin-$endSide: 13px;
margin-bottom: 4px;
margin-$startSide: 13px;
}
.main .Blog {
margin: 0;
}
/* Links
----------------------------------------------- */
a:link {
color: $mainLinkColor;
}
a:visited {
color: $mainVisitedLinkColor;
}
a:hover {
color: $mainVisitedLinkColor;
}
a img {
border-width:0;
}
/* Blog Header
----------------------------------------------- */
#header-wrapper {
background: #000 $startSide top;
margin-top:22px;
margin-$endSide:0;
margin-bottom:0;
margin-$startSide:0;
padding-top:8px;
padding-$endSide:0;
padding-bottom:0;
padding-$startSide:0;
color:$titleTextColor;
}
#header {
text-align:center;
letter-spacing:20px;
background: no-repeat $startSide bottom;
padding:0 15px 8px;
}
#header h1 {
margin:0;
padding:10px 30px 5px;
line-height:1.2em;
font: $pageTitleFont;
}
#header a,
#header a:visited {
text-decoration:none;
color: $titleTextColor;
}
#header .description {
margin:0;
padding:5px 30px 10px;
line-height:1.5em;
font: $descriptionFont;
}
/* Posts
----------------------------------------------- */
h2.date-header {
margin-top:0;
margin-$endSide:28px;
margin-bottom:0;
margin-$startSide:43px;
font-size:85%;
line-height:2em;
text-transform:uppercase;
letter-spacing:.2em;
color:$dateHeaderColor;
}
.post {
margin:.3em 0 25px;
padding:0 13px;
border:1px dotted $borderColor;
border-width:1px 0;
}
.post h3 {
margin:0;
line-height:1.5em;
background:url("http://www.blogblog.com/rounders4/icon_arrow.gif") no-repeat 10px .5em;
display:block;
border:1px dotted $borderColor;
border-width:0 1px 1px;
padding-top:2px;
padding-$endSide:14px;
padding-bottom:2px;
padding-$startSide:29px;
color: $postTitleColor;
font: $postTitleFont;
}
.post h3 a, .post h3 a:visited {
text-decoration:none;
color: $postTitleColor;
}
.post h3 a:hover {
background-color: $borderColor;
color: $postTitleColor;
}
.post-body {
border:1px dotted $borderColor;
border-width:0 1px 1px;
border-bottom-color:$mainBgColor;
padding-top:10px;
padding-$endSide:14px;
padding-bottom:1px;
padding-$startSide:29px;
line-height: 25px;
font-family: Verdana, Arial, Helvetica, sans-serif;
font-size: 14px;
}
html>body .post-body {
border-bottom-width:0;
}
.post p {
margin:0 0 .75em;
}
.post-footer {
background: #000;
margin:0;
padding-top:2px;
padding-$endSide:14px;
padding-bottom:2px;
padding-$startSide:29px;
border:1px dotted $borderColor;
border-width:1px;
font-size:100%;
line-height:1.5em;
color: #acb;
}
.post-footer p {
margin: 0;
}
html>body .post-footer {
border-bottom-color:transparent;
}
.uncustomized-post-template .post-footer {
text-align: $endSide;
}
.uncustomized-post-template .post-author,
.uncustomized-post-template .post-timestamp {
display: block;
float: $startSide;
text-align:$startSide;
margin-$endSide: 4px;
}
.post-footer a {
color: #fff;
}
.post-footer a:hover {
color: #eee;
}
a.comment-link {
/* IE5.0/Win doesn't apply padding to inline elements,
so we hide these two declarations from it */
background/* */:/**/url("http://www.blogblog.com/rounders4/icon_comment_$startSide.gif") no-repeat $startSide 45%;
padding-$startSide:14px;
}
html>body a.comment-link {
/* Respecified, for IE5/Mac's benefit */
background:url("http://www.blogblog.com/rounders4/icon_comment_$startSide.gif") no-repeat $startSide 45%;
padding-$startSide:14px;
}
.post img {
margin-top:0;
margin-$endSide:0;
margin-bottom:5px;
margin-$startSide:0;
padding:4px;
border:1px solid $borderColor;
}
blockquote {
margin:.75em 0;
border:1px dotted $borderColor;
border-width:1px 0;
padding:5px 15px;
color: $dateHeaderColor;
}
.post blockquote p {
margin:.5em 0;
}
#blog-pager-newer-link {
float: $startSide;
margin-$startSide: 13px;
}
#blog-pager-older-link {
float: $endSide;
margin-$endSide: 13px;
}
#blog-pager {
text-align: center;
}
.feed-links {
clear: both;
line-height: 2.5em;
margin-$startSide: 13px;
}
/* Comments
----------------------------------------------- */
#comments {
margin:-25px 13px 0;
border:1px dotted $borderColor;
border-width:0 1px 1px;
padding-top:20px;
padding-$endSide:0;
padding-bottom:15px;
padding-$startSide:0;
}
#comments h4 {
margin:0 0 10px;
padding-top:0;
padding-$endSide:14px;
padding-bottom:2px;
padding-$startSide:29px;
border-bottom:1px dotted $borderColor;
font-size:120%;
line-height:1.4em;
color:$postTitleColor;
}
#comments-block {
margin-top:0;
margin-$endSide:15px;
margin-bottom:0;
margin-$startSide:9px;
}
.comment-author {
background:url("http://www.blogblog.com/rounders4/icon_comment_$startSide.gif") no-repeat 2px .3em;
margin:.5em 0;
padding-top:0;
padding-$endSide:0;
padding-bottom:0;
padding-$startSide:20px;
font-weight:bold;
}
.comment-body {
margin:0 0 1.25em;
padding-top:0;
padding-$endSide:0;
padding-bottom:0;
padding-$startSide:20px;
}
.comment-body p {
margin:0 0 .5em;
}
.comment-footer {
margin:0 0 .5em;
padding-top:0;
padding-$endSide:0;
padding-bottom:.75em;
padding-$startSide:20px;
}
.comment-footer a:link {
color: #ced;
}
.deleted-comment {
font-style:italic;
color:gray;
}
/* Profile
----------------------------------------------- */
.profile-img {
float: $startSide;
margin-top: 5px;
margin-$endSide: 5px;
margin-bottom: 5px;
margin-$startSide: 0;
border: 4px solid $topSidebarTextColor;
}
.profile-datablock {
margin-top: 0;
margin-$endSide: 15px;
margin-bottom: .5em;
margin-$startSide: 0;
padding-top: 8px;
}
.profile-link {
background:url("http://www.blogblog.com/rounders4/icon_profile_$startSide.gif") no-repeat $startSide .1em;
padding-$startSide:15px;
font-weight:bold;
}
.profile-textblock {
clear: both;
margin: 0;
}
.sidebar .clear, .main .widget .clear {
clear: both;
}
#sidebartop-wrap {
background:$topSidebarBgColor no-repeat $startSide bottom;
margin:0px 0px 15px;
padding:0px 0px 10px;
color:$topSidebarTextColor;
}
#sidebartop-wrap2 {
background: $topSidebarBgColor no-repeat $startSide top;
padding: 10px 0 0;
margin:0;
border-width:0;
}
#sidebartop h2 {
line-height:1.5em;
color:$topSidebarHeaderColor;
border-bottom: 1px dotted $topSidebarHeaderColor;
font: $headerFont;
margin-bottom: 0.5em;
}
#sidebartop a {
color: $topSidebarLinkColor;
}
#sidebartop a:hover {
color: $topSidebarVisitedLinkColor;
}
#sidebartop a:visited {
color: $topSidebarVisitedLinkColor;
}
/* Sidebar Boxes
----------------------------------------------- */
.sidebar .widget {
margin:.5em 13px 1.25em;
padding:0 0px;
}
.widget-content {
margin-top: 0.5em;
}
#sidebarbottom-wrap1 {
margin:0 0 15px;
padding:10px 0 0;
color: $bottomSidebarTextColor;
}
#sidebarbottom-wrap2 {
background: no-repeat $startSide bottom;
padding:0 0 8px;
}
#sidebar {
color: $bottomSidebarTextColor;
}
#sidebar h2 {
color: $bottomSidebarTextColor;
border-bottom: 1px dotted $bottomSidebarTextColor;
margin-bottom: 0.5em;
}
#sidebar a {
color: $bottomSidebarLinkColor;
}
#sidebar a:hover,
#sidebar a:visited {
color: $bottomSidebarVisitedLinkColor;
}
.sidebar h2 {
margin:0;
padding:0 0 .2em;
line-height:1.5em;
font:$headerFont;
}
.sidebar ul {
list-style:none;
margin:0 0 1.25em;
padding:0;
}
.sidebar ul li {
background:url("http://www.blogblog.com/rounders4/icon_arrow_sm.gif") no-repeat 2px .25em;
margin:0;
padding-top:0;
padding-$endSide:0;
padding-bottom:3px;
padding-$startSide:16px;
margin-bottom:3px;
border-bottom:1px dotted $borderColor;
line-height:1.4em;
}
.sidebar p {
margin:0 0 .6em;
}
/* Footer
----------------------------------------------- */
#footer-wrap1 {
clear:both;
margin:0 0 10px;
padding:15px 0 0;
}
#footer-wrap2 {
background:#447766 $startSide top;
color:$titleTextColor;
}
#footer {
background: $startSide bottom;
padding:8px 15px;
}
#footer hr {display:none;}
#footer p {margin:0;}
#footer a {color:$titleTextColor;}
#footer .widget-content {
margin:0;
}
/** Page structure tweaks for layout editor wireframe */
body#layout #main-wrap1,
body#layout #sidebar-wrap,
body#layout #header-wrapper {
margin-top: 0;
}
body#layout #header, body#layout #header-wrapper,
body#layout #outer-wrapper {
margin-$startSide:0,
margin-$endSide: 0;
padding: 0;
}
body#layout #outer-wrapper {
width:%65;
}
body#layout #footer-wrap1 {
padding-top: 0;
}
]]></b:skin>
</head>
<body>
<div id='outer-wrapper'>
<div id='header-wrapper'>
<b:section class='header' id='header' maxwidgets='1'>
<b:widget id='Header1' locked='true' title='凡人凡居 (标题)' type='Header'/>
</b:section>
</div>
<div id='crosscol-wrapper' style='text-align:center'>
<b:section class='crosscol' id='crosscol' showaddelement='no'/>
</div>
<div id='main-wrap1'><div id='main-wrap2'>
<b:section class='main' id='main' showaddelement='no'>
<b:widget id='Blog1' locked='true' title='博客文章' type='Blog'/>
</b:section>
</div></div>
<div id='sidebar-wrap'>
<div id='sidebartop-wrap'><div id='sidebartop-wrap2'>
<b:section class='sidebar' id='sidebartop'>
<b:widget id='Profile1' locked='false' title='Host' type='Profile'/>
</b:section>
</div></div>
<div id='sidebarbottom-wrap1'><div id='sidebarbottom-wrap2'>
<b:section class='sidebar' id='sidebar' preferred='yes'>
<b:widget id='LinkList2' locked='false' title='Favorite area' type='LinkList'/>
<b:widget id='BlogArchive1' locked='false' title='博客归档' type='BlogArchive'/>
<b:widget id='LinkList1' locked='false' title='Links' type='LinkList'/>
</b:section>
</div></div>
</div>
<div id='footer-wrap1'><div id='footer-wrap2'>
<b:section class='footer' id='footer'/>
</div></div>
</div>
</body>
</html>
2008年4月9日
2008年4月7日
扩展发表文章(Expandable post summaries with Beta)
I came up with two better versions later. Use one of them instead of this older version.
1. One with which you can selectively make some of the old posts expandable i.e. only summaries will show up for them and clicking a "read more..." link will take you to the post page.
2. One that expands posts in the main page itself - Peekaboo style.]
Jornada left a comment in my blog that he found a blog which explained how to show expandable post summaries with Beta. Good thing about showing only post summary in the main page is that your readers can quickly find all that you have written about. Also, your blog gets an 'online journal'-like neat look. A "Read more" link is provided which takes them to the post page to read the entire post. Please note that you, as the author, have the flexibility to choose the portion of your post that appears as summary.
This hack is only an adaptation of Blogger's original instructions for expandable post summaries to Beta template. You can find Jornada's post about this here. I thought I will re-post the instructions with minor modifications for my readers.<div class="post-header-line-1">
<div class="post-body">
<span style="font-weight: bold; color: rgb(255, 0, 0);">
<b:if cond="data:blog.pageType == "item"">
<style>.fullpost{display:inline;}</style>
</b:if><p><data:post.body></data:post.body></p>
<b:else>
<style>.fullpost{display:none;}</style>
</b:else><p><data:post.body></data:post.body></p>
<a style="color: rgb(255, 0, 0);" href="data:post.url">Read More......</a>
</span>
<div style="clear: both;"> <!-- clear for photos floats -->
</div>
Step 2. Goto Settings->Formatting and at the bottom, you will find the text box provided to specify the "Post template". Copy/paste these lines into that text box and save the settings.
Type your summary here
<span class="fullpost">
Type rest of the post here
</span>
If you create a new post now, it shows you clearly where to type the summary and where to add the rest of the post. Follow the format and only summary will show up in your main page. Please note that you also need to divide your old posts like this (atleast the ones showing up in main page) into summary and full portions by editing them.
2008年4月4日
特定进程cpu占用率
Introduction
The information in this article applies to Windows NT, Win2K/XP. There is no specific Win32 API that retrieves the CPU usage. An undocumented API, NtQuerySystemInformation in ntdll.dll, would help us retrieve the CPU usage. However, CPU usage can be retrieved by using performance counters. Since PDH.dll (Performance Data Helper) is not distributed with the Visual Studio, and not everyone has this file, I decided to do it without the help of PDH.dll.
The CPU usage counter is of type PERF_100NSEC_TIMER_INV which has the following calculation:
100*(1-(X1-X0)/(Y1-Y0))
X - CounterData
Y - 100NsTime
Time base - 100Ns
where the denominator (Y) represents the total elapsed time of the sample interval and the numerator (X) represents the time during the interval when the monitored components were inactive.
My CCpuUsage class has a method called GetCpuUsage which runs through the performance objects and counters and retrieves the CPU usage. Since the CPU usage can be determined by two samplings, the first call to GetCpuUsage() returns 0, and all calls thereafter returns the CPU usage.
Comment
On Windows NT, CPU usage counter is '% Total processor time' whose index is 240 under 'System' object whose index is 2. However, in Win2K/XP, Microsoft moved that counter to '% processor time' whose index is 6 under '_Total' instance of 'Processor' object whose index is 238. Read 'INFO: Percent Total Performance Counter Changes on Windows 2000' (Q259390) in MSDN.
There is no difference between WinNT and Win2K/XP in the performance counters for getting CPU usage for a specific process. The counter '% processor time' whose index is 6 under the object 'Process' whose index is 230.
The Sample
#include "CpuUsage.h"

int main(int argc, char* argv[])
{
int processID=0;
CCpuUsage usageA;
CCpuUsage usageB;
CCpuUsage usageC;

printf("SystemWide Cpu Usage "
"Explorer cpu usage "
"Cpu Usage for processID 0\n");
printf("==================== "
"================== "
"========================\n");
while (true)
{
// Display the system-wide cpu usage and the "Explorer" cpu usage

int SystemWideCpuUsage = usageA.GetCpuUsage();
int ProcessCpuUsageByName = usageB.GetCpuUsage("explorer");
int ProcessCpuUsageByID = usageC.GetCpuUsage(processID);
printf("%19d%%%22d%%%31d%%\r",SystemWideCpuUsage,
ProcessCpuUsageByName, ProcessCpuUsageByID);

Sleep(1000);
}
return 0;
}
src
demo
2007年1月20日
简单汇编指令
N年前写的,呵呵。第一贴,还是不删了。
MOV EBP,ESP
MOV [XXX],ESP //XXX 为具体内存地址数据
一定要记住没加括号只是访问的寄存器中的值
加了括号的,比如[10]是内存地址10指向的值,
比如内存是这样的
00000010: 00 (我乱写的)
对[10]操作就相当于对00操作.
我比较笨,有时候简单的问题都要卡住,还是记下来警告自己吧...
订阅:
博文 (Atom)
